There are several technical aspects to Resin Driveway Installation by professionals such as West Coast Resins. This level of precision and skill, we feel, distinguishes us from other resin driveway installers in Blackpool. We go through a few of them in depth here.
West Coast Resins installs resin driveways
Sub-Bases Suitable for Resin-Bound Installations:
- Tarmac and concrete are the best sub-base materials for resin-bound surface.
- Some installers are happy to install resin-bound on top of paving slabs or block paving. Movement in these sub-bases is more common and might create cracking in your resin surface, thus it is not suggested.
- Resin-bound surface can also be installed on grid systems. The grid must be mounted on a compacted MOT base.
- 3/6 inch MOT type 1 should be fitted if a new sub-base is required. This will be followed by at least 2 inches of 10mm base coat tarmac. This allows us to return in three days to install your resin surface; concrete can take up to a month to fully cure.
Edges/Manholes Preparation
- West Coast Resins installs resin bound systems at a minimum thickness of 15mm for driveways and 12mm for walkways and patios.
- We can put your resin surface against home walls, block edging, key kerbs, pin kerbs, fences, or aluminium beading.
- A professional finish is achieved by installing an edge at the front and sides of an existing surface.
- Recessed manholes can be used to give a unified aesthetic for a driveway walk or patio. The current manhole cover will be removed, and any circular manholes will be dug to make way for a rectangular recessed tray. During the installation, a resin and stone combination can be used to ‘Cement' the new manhole into place.
Repairs to the sub-base:
- Before your resin installation, the present sub-base may require some care.
- Because the flaking on the concrete surface is mainly aesthetic, it may be removed during the drive's jet cleaning and replaced with your resin surface.
- During preparations, any surface cracking can be cut off using a still saw in a ‘V' form. Instead of cement, a resin and stone combination can be utilised to complete the repair.
- Structural cracking that cannot be rectified will need the construction of a new sub-base.
Surface preparation:
- Before installing your resin-bound surface, we must check that it is free of:
- Surface plaster / Dust Water Oil / Grease
- If they are not removed prior to installation, delamination can occur, requiring the entire driveway to be replaced!
Toe-Ins and Patterns:
- Customers of West Coast Resin frequently request that a design be incorporated into their resin-bound installation, which may be accomplished in a variety of ways…
- The most common option is to install an aluminium stencil, which allows us to finish the installation on the same day. A stencil may be ordered and put into the sub-base using plugs, screws, and washers for complicated designs.
- Custom stencils for numerals and letters can also be made using aluminium stop beading. This is attached to the surface by plugs, screws, and washers. Bendy beading may also be used to make curves for your letters and numerals.
Ply or Foamex pattern formers can be used with a Vaseline or similar release agent. These may be removed the next day, and the installation can resume with a different colour.
Mixers
- West Coast Resins uses a forced-action mixer to combine resin-bound materials…
- Forced action mixers, as opposed to cement mixers, prevent dry areas and provide a more equal mixing.
- These upright mixers produce an equal mixture by folding the material into itself, and they should be employed to guarantee that the final surface has the same strength in all regions.
- A cement mixer can be used for smaller areas (under 30m2), but it is not advised since dry patches in the mixture can form.
- Mixers should be 120L or greater in order to mix all of your aggregates at once. Smaller mixers can be utilised, but they are typically only 70L in capacity, making on-site mixing more challenging.
Aggregates, Dried
- Resin Bound and Bonded pavement requires the use of specialised dried aggregates.
- Dirt and moisture in normal aggregates react with the resin and impede a proper connection.
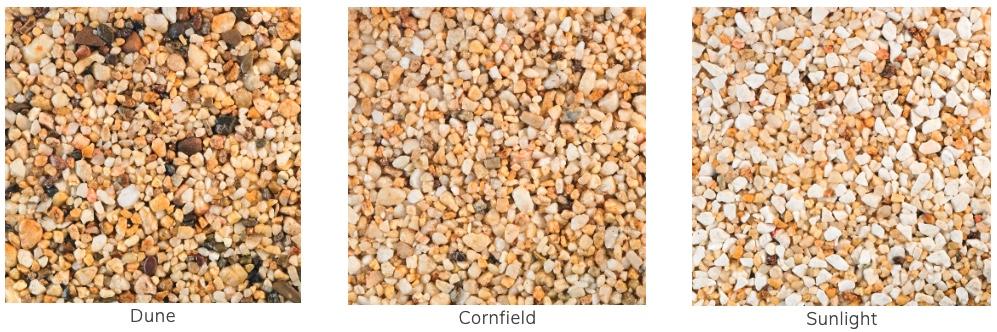
- There are around 25 distinct colour options available. To form a ‘blend,' we usually combine two colours.
- Each resin kit can cover 4m2 with 4 bags totaling 25kg.
- To eliminate dust and properly mix your ‘blend,' spin your resin stone in the mixer for 1 minute before adding your resin.
- For resin bound driveways, a 2-5mm stone is typically utilised. A 1-3mm stone can be added to the mixture to reinforce the final surface, however coverage is limited due to the stone's increased surface area.
- Generally, 1-3mm stone is utilised for resin-bonded surface, while 10mm aggregates are used for tree pits.
Material Combination
- To eliminate dust, add aggregates to the mixer for 1 minute before combining resin materials.
- A plasterer's electric hand mixer must be used when mixing two parts resin.
- Pour the Activator (Part B) into the bigger Base unit (Part A) and vigorously mix for 1 minute.
- A stick cannot be used since it will cause soft spots in the completed driveway, walkway, or patio.
- After that, the resin should be added to the mixer. A piece of card may be necessary to scrape the mixture from the bucket to ensure that all resin is applied.
- Mix the resin and stone for two minutes, or until the stone is completely coated.
- To avoid colour variations, it is critical to keep the stone and resin in the mixer for the same amount of time for each mixing.
- Don't forget about this! Stone is a naturally obtained product with minor colour variations; for bigger installations, we blend each batch to prevent differences.
Other Important Mixing Points…
- To improve the anti-skid qualities, add 5kgs of Kiln dried sand to each batch.
- Placing mixing paddles on a clean surface/using a plastic cover helps to avoid leaving scratches on adjacent surfaces.
- While the current combination is being laid, the next mixture should be created.
- Temperatures will influence setting times.
- To extend the life of wheelbarrows that accumulate material, line them with a polythene bag.
- To avoid becoming wet, keep the stone covered if left overnight.
- Condensation in freezing temperatures can harm the stone; it must be kept cool and dry.
- To give the surface a new aesthetic, recycled glass can be put beside the stone. It may, however, only be used in ornamental areas with no foot traffic.
- To provide a better anti-slip surface, glass beading can be sprinkled into the final surface before setting.
Issues to Avoid During Installation
- To avoid white areas while the resin cures, keep the stone dry at all times.
- Tarpaulin sheets should be kept on hand in case a rain shower begins.
- To minimise colour alteration, stones from various batches should be combined for larger tasks.
- To avoid colour change, leave the resin and stone in the mixer for the same amount of time.
- White spirits can be used to erase marks on UPVC doors and windows; however, wood fences will remain stained.

WEST COAST RESIN DRIVEWAYS BLACKPOOL
Back Kingsland Grove, Unit 4
Blackpool
Lancashire
FY2 9TQ
CALL:
The post Resin Driveway Installation Best Practice Tips appeared first on https://richcitations.org
The post Resin Driveway Installation Best Practice Tips appeared first on https://wookicentral.com
The post Resin Driveway Installation Best Practice Tips appeared first on https://gqcentral.co.uk


Comments are closed